Beginning Position
- For your first row, set the resistance low while you figure out your form, then slowly ramp it up on subsequent rows.
- Secure your feet on the pads with the straps tight enough so your feet don't move around as you slide.
- Bring your knees up and slide to the top of the machine. Grab the handle using an overhand grip, but don't hold too tightly.
- Pull the handle with you as you slide to the end of the machine. Your legs should be straight, but knees should still have a slight bend in them so they aren't locked. Lean back slightly and pull your hands up to your chest, holding the handle so it is right below your breasts, with elbows pointing down against your sides. This is the position where you should begin your workout, and it's also your ending position once you complete a full stroke (see below).
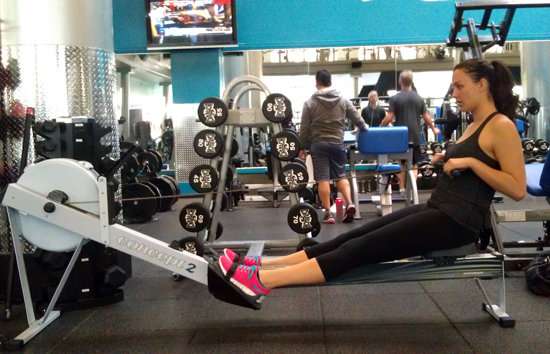
The Catch
- Move your arms out first, followed by your upper body. Your back should always stay straight, not slumped, with shoulders back and abs engaged as you follow through. As your arms extend out, your upper body position will go from slightly angled back to slightly angled forward.
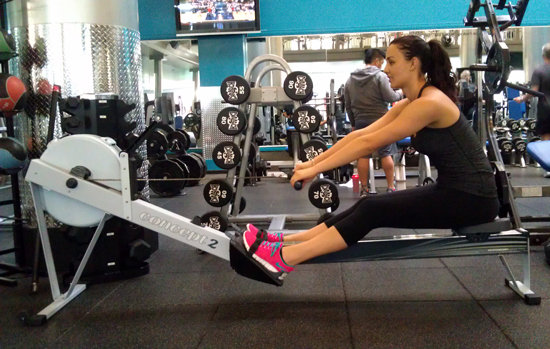
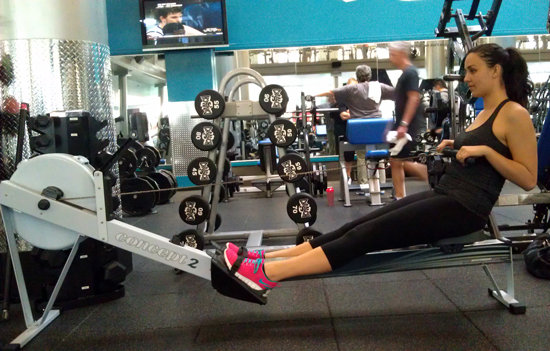
- As your arms extend and body leans forward, slide your body forward on the seat by bending your legs. Once you are at the top of the machine, your arms will be fully extended and legs will be bent (see below). This part of the stroke is called the catch.
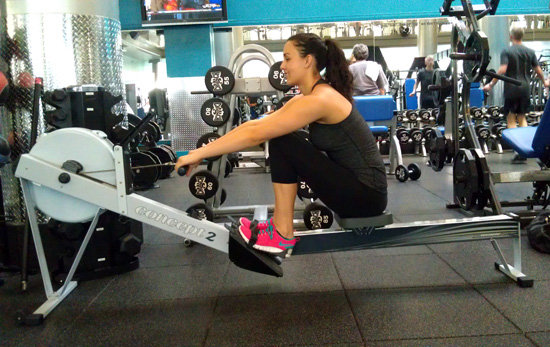
The Drive
- To slide back to your finish position, push off with your feet first, so that your legs straighten but your arms are still extended and your body is still slightly leaning forward (see below). The drive is the part of the workout that mimics pulling the oars out of the water and propelling the boat forward, so it's this part that works your leg and core muscles the most.
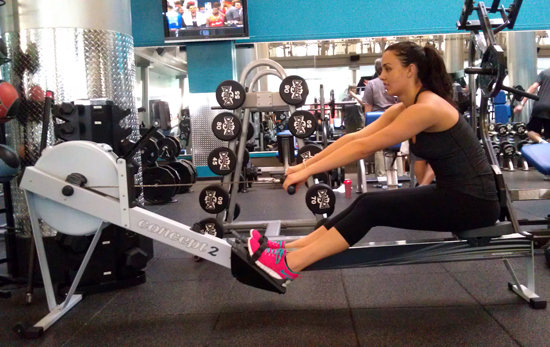
- As you continue to push through with your legs, move your upper body so that you begin to lean back (see below).
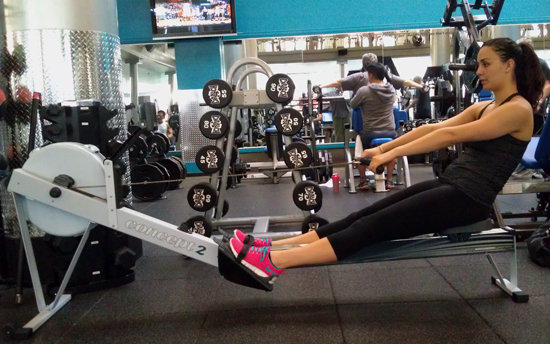
- The last part of your body to return to finish position are your arms; as your upper body angles back, pull the handle and bend your arms so that the handle ends up back to touching the front of your chest, just like how you started (see below). Don't grip the handle too hard; the power should be through your legs, and using too much force while pulling the cable can cause hand blisters as well as back problems.
- Continue practicing your stroke slowly and at low resistance until you get the hang of it! It can be helpful to break the moves down into a sequence of what should move first: "arms-body-legs" as you pull up to the top of the machine and "legs-body-arms" as you push back.
You don't want to leave the majority of the work to your arms and upper body. Our legs are much stronger (generally) than our arms. Here are a few exercises to help increase your leg power.
Squat Thruster
Box Jumps
Tuck Jumps
Basically any plyometric leg exercise will work.
Hand Release Push Ups
Renegade Row
Pull Up
Plyometric Push Up
Now that you've got the strength, you need to work on your speed, and speed (or sprinting) endurance. The best way to do this is to actually practice sprinting, or excreting high levels of energy for extended periods of time. Here are a few of my favorite high intensity drills.
Tabata: This is a 4 minute interval, 20 seconds high intensity, and 10 seconds rest, repeated 8 times. You can do this with basically any exercise, be it running, riding a bike, squatting, push ups... Just remember the higher the intensity the better.
Circuit: There are several different ways that a circuit can be performed. My favorite is 30 seconds on and 3 second transition alternating between a resistance exercise (squats, push ups, planks...) and a high intensity cardio exercise (buprees, mountain climbers, tuck jumps...) Here is a great one for you.
Here is a more complete explanation of High Intensity Interval Training.
Remember to practice rowing at least a couple of times a week, and work in these other helpful exercises on the other days. Some days will naturally be easier than others, but don't get discouraged!


No comments:
Post a Comment